Garden hoses often get stuck on spigots, and this can be a frustrating experience. Luckily, there are some straightforward steps you can take to remove it safely without damaging any of your plumbing. Today, I’m going to talk about what to do if your hose is stuck on a spigot.
This article was last updated on by Lawn Chick Owner Sarah Jameson
Article content reviewed for accuracy by Horticulturist Arthur Davidson, A.S., a member of our expert panel
In a Hurry? Here’s the Short Answer:
If your hose is stuck on a spigot, use pliers (I like channel locks or vice grips) or another gripping tool (like an adjustable crescent wrench) so you can apply enough force to break the connection – but be careful not to damage the interior plumbing. If the fitting is quite old and you’re having difficulty, try applying some penetrating oil or another lubricant first. (jump to full instructions)

If you’re like me, once a hose is attached to your outdoor spigot in the spring, it stays attached throughout the growing season. This way it’s available for watering pots and planters, hooking up to the sprinkler, filling the kiddie pool for the kids or pups, etc.
But when you leave hoses attached to an outdoor spigot for a long time it’s harder to get it off, which is probably why you’re here.
I’ll start off by explaining a bit about how hose fittings work, and then give you some guidance for the best methods to get your hose off without damaging anything.
| LawnChick.com is reader supported. If you make a purchase after clicking a link, I may earn a commission at no additional cost to you. |
Understanding How Hose Fittings Work
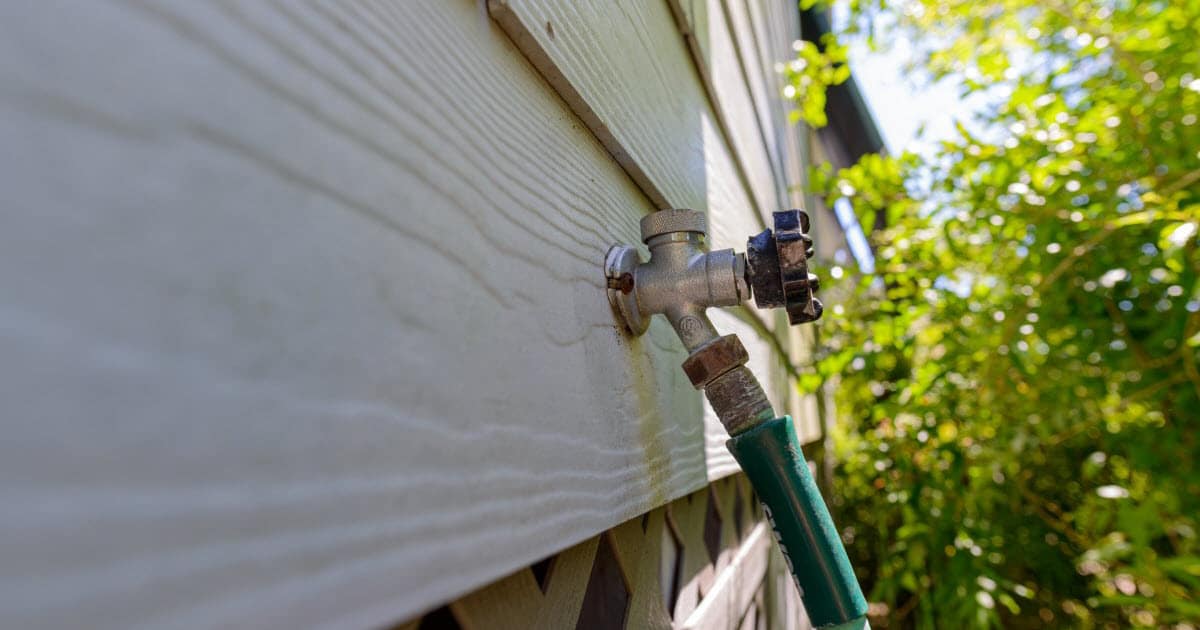
Every garden hose has threads that match up with the standard threads on an exterior spigot (sometimes called a hose bib of silcock).
While these are designed to allow hoses to be attached and removed without having to use any tools, the conditions of being located outside mean that it can become difficult to remove the hose.

For example, weather, dirt, and general wear can cause the fitting to become stuck over time. Changes in temperature can cause plastic and metal to expand and contract, which can make the connection tight and difficult to break.
When this happens, you may need to use some force to loosen it up. But don’t use too much force, or you may damage the fitting or even break it off.
Beyond the risk of damage to your hose and the spigot, you also need to stay aware of the potential of wall damage, and interior plumbing if you use too much force. Often spigots are attached with a few screws to the wall. If you pull too hard, they may come loose or take out a part of the wall with them (which also will make the interior plumbing connections vulnerable to damage).
Is the spigot heavily corroded? I recommend removing it from the wall and replacing it with a new one.
How To Safely Remove A Stuck Hose
You need the right tools and techniques to remove a stuck hose from a spigot without damaging your home.

Removing a stuck hose from a spigot doesn’t have to be a daunting task. By using the right tools and techniques, you can easily get your garden hose off of your spigot in no time. Just make sure you use caution and understand how hose fittings work before attempting to remove them.
What You’ll Need
A good set of pliers or an adjustable crescent wrench are essential, and I also like to have some penetrating lubricating oil on hand in case I need it to help loosen up any rust or dirt that may be stop your hose from coming loose.
Arthur Davidson, a horticulturist and member of Lawn Chick’s expert panel, says that “channel locks are best to get an accurate bite on a stuck female hose end.” He adds that in extreme cases, “it may be necessary to use a propane torch to remove the hose from the spigot.”
I own this vise-grip plier set from Irwin and it’s ideal for a job like this, so if you’re running to the hardware store look for something similar.
Where to Start
To start with, I recommend that you gently but firmly pull on the hose while wiggling it back and forth at the same time. This will help to break up any accumulated rust and dirt, making it easier for you to dislodge the hose.
You can also use a rubber mallet or hammer to tap gently on the spigot in order to loosen it up. Just be sure not to apply too much force, as this could damage both the hose fitting and the wall of your home.
How to Break the Connection
Once you’ve loosened things slightly, use your channel-lock pliers, a wrench, or vise-grips to loosen the stuck hose.
Remember the rule: Right (or clockwise) tightens the connection, and Left (counter-clockwise) loosens the connection. You want to turn the hose counter-clockwise to unscrew it from the spigot.
Be sure to use caution when doing this, as too much force could result in damage.
Using Two Sets of Pliers May Help
If the hose is really stuck on there and you aren’t able to make progress, get a second set of pliers or channel locks and grip the spigot with those. Apply force on these with one hand to keep the spigot in position as you work to detach the hose. This method will allow you to use more force on the other set to unscrew the hose without damaging the spigot or interior plumbing.
Another tip is to remember that the longer the handles of your pliers, the more leverage you’ll have, which will make it easier to turn the stuck hose connection. Even if you don’t have long-handled pliers, you can slide a hollow pipe over the handles to give yourself more leverage.
Try Penetrating Lubricants for Severe Cases
Using a product like Liquid Wrench (Amazon link) where the spigot threads meet the hose connection to penetrate and loosen can help break the stuck connection as well.
Once the hose is removed, inspect it for any signs of wear or tear. Then, you can reattach it to the spigot.
What if the Hose is Damaged in the Process?
If you’ve damaged the end of your hose, but the hose itself is in good shape – don’t throw the whole thing away! You can buy a garden hose repair kit like this one and easily replace the end connector yourself for less than $10.
Much cheaper than buying a new hose.
Assessing The Damage Of A Corroded Spigot
There is a lot of moisture involved in plumbing (obviously). This is why spigots tend to get corroded over time. If your spigot has significant corrosion, you may need to think about replacing the fitting entirely.

When assessing the damage of a corroded spigot, you should inspect it thoroughly before attempting to remove or replace it. Look for any rust or discoloration on the metal, as well as any potential cracks or other signs of wear.
Is the spigot still in good condition? Try to remove the hose and lubricate it with oil to help make the process easier. If you are unable to get it off, then consider replacing the fitting instead.
You can remove minor surface corrosion. However, if the damage is severe, you should replace the spigot entirely.
In my experience some quick repairs and maintenance is usually enough. Once you get the hose off you can use an abrasive material such as a steel brush to remove any rust or burrs from the spigot. Then, lubricate the spigot again with oil before reattaching the hose, ideally with a new replacement connector after you replace the old hose end connector that was stuck.
How To Find Replacement Parts for Older Models of Spigots?
Older models of spigots can be incompatible with a majority of the hoses available today, making it difficult to find replacement parts and connections for them.

If you need replacement parts for an older spigot model, your best bet may be to search online or contact local hardware stores. Take a photo of what you have before you go to the store, so they can visualize what you’re working with and help you. They should have access to a variety of different suppliers and manufacturers who may have compatible parts for your spigot.
I recommend looking online, as you can often find forums and communities of people with similar issues who can offer their advice and tips.
Additionally, there are websites that specialize in selling replacement parts for older spigots.
It can also be a good idea to consider finding a part that joins the old style of spigot with the new. Buying a connector like this will make it easier to attach newer hoses, and is a good low-cost method for bridging the difference between old and new plumbing. This may require you to have a bit of technical knowledge and require more time and effort, but in my experience, the right part and going this route can save you money.
How To Prevent The Hose From Getting Stuck Again
In order to prevent your hose from getting stuck on a spigot, it is important to check the hose for any wear or damage before attaching it. If you notice any issues with the hose connector, then replace it before using it again. As I mentioned earlier, a hose repair kit like this one is less than $10 and can make an old hose new again in about 10 minutes.

It is also important to ensure that the hose is properly attached to the spigot, as this will help prevent it from becoming stuck. Avoid cross-threading the hose connector, and make sure that all of the connections are aligned properly, secure and tight before turning on the water source.
Cleaning both the hose and the spigot will also help reduce the amount of corrosion and buildup that can occur over time. Regularly use a brush to remove any dirt or debris that may be stuck in either part. This will help prevent it becoming too difficult to remove the hose in the future.
I also advise homeowners to pay attention to the weather. If you attach a hose in the summer, and wait until late fall when temperatures have fallen below freezing to detach the hose, then you’re setting yourself up for a tough go of it. The threads will have contracted and tightened, and any moisture that lingered in the connection will be frozen – making it difficult to remove.
If you did forget to detach your hose when temperatures were still warm in the fall, try warming some water inside, then pouring it slowly over the spigot and hose connection before you attempt to detach the hose. Sometimes this can help.
When to Throw in the Towel and Hire a Pro
While you may be able to handle some minor plumbing tasks, let’s be real – nobody wants to give up their entire weekend to a project like getting a stuck hose off a spigot.

In cases where the corrosion has become too severe or if you don’t feel confident in your ability to remove the hose without damaging your home or plumbing, calling a plumber may be the best option.
A plumber will have access to the right tools and knowledge to provide a safe and secure solution for removing the hose from the spigot. If the spigot is damaged and needs to be replaced, they can do that for you during the same house-call.
They can also advise you on how to prevent it from happening again in the future.
Another Reason Hiring a Pro to Replace Might Make Sense
Often, when homeowners think of their outdoor spigots they don’t think about their home water supply, but they should.
Many modern spigots have an anti-siphon feature or backflow preventer which prevents any dirt and debris in hoses, irrigation lines, etc. from being sucked back into the potable water supply used in your home. This wasn’t included with many old spigots, and might make an upgrade worth the money for added peace of mind.
If you apply lawn care products like fertilizer or weed killer via a ready-to-use hose-end sprayer, having a backflow preventer is important in my opinion – whether you retrofit your old spigot with one like this, or get a new frost-free silcock that has one built-in like this one.
No matter what situation you are in, if you feel uncomfortable with attempting the task yourself, then there is no shame in seeking professional help. They will be able to provide the right advice and tools that you need to get the job done safely and securely.
Tips for Using a Hose to Water Your Lawn
Once you get your hose unstuck, if you’re going to use it to water your lawn, make sure you’re doing it the right way.
Richard Jauron, an expert at Iowa State University Extension and Outreach, explains that “Early morning (5:00 to 9:00 am) is the best time to water the garden when using a sprinkler, garden hose, or any other device that wets the plant foliage.”
When you water your lawn the right way, when the “watering is completed, the plant foliage dries quickly.” This is important, as quick “drying of plant foliage helps guard against the development of fungal diseases.”
Another perk of morning watering is that it “allows the water to soak deeply into the soil with little water lost to evaporation.” You should avoid watering at midday, as that will lead to “rapid evaporation.”
Final Thoughts About Removing a Stuck Hose from an Outdoor Spigot
So, now you know what to do if your hose is stuck on its spigot. As I mentioned here, you should use the right tools and be careful when removing your hose. You could risk damaging or breaking the hose and our spigot if you use too much force.
In some cases, if you notice a lot of corrosion on the spigot, you’ll probably want to replace it with a new one.
Remember, it’s important to take your hose off the spigot before the cold weather sets in, but if you forgot and find your hose is stuck in the fall, try my trick for pouring hot water over the spigot and hose connection to see if that loosens it up for you.


