Lawn edging is a surprisingly simple task that (when done properly) will set your lawn apart from many others. Having untidy edges to your yard makes your lawn look unkempt, even with regular mowing and proper irrigation and fertilization. The truth is that it doesn’t take much more effort to clean up those edges and give your lawn a masterful look. In today’s article I’ll tell you how to do it, the tools and techniques you can try, common mistakes to avoid, and some methods to improve your landscape design (and make edging your lawn easier at the same time).
Let’s get right to it!
This article was last updated on by Lawn Chick Owner Sarah Jameson
Article content reviewed for accuracy by Certified Horticulturist Nicole Forsyth, M.S. who is a member of our expert panel
Why Edging Your Lawn is Worth the Effort
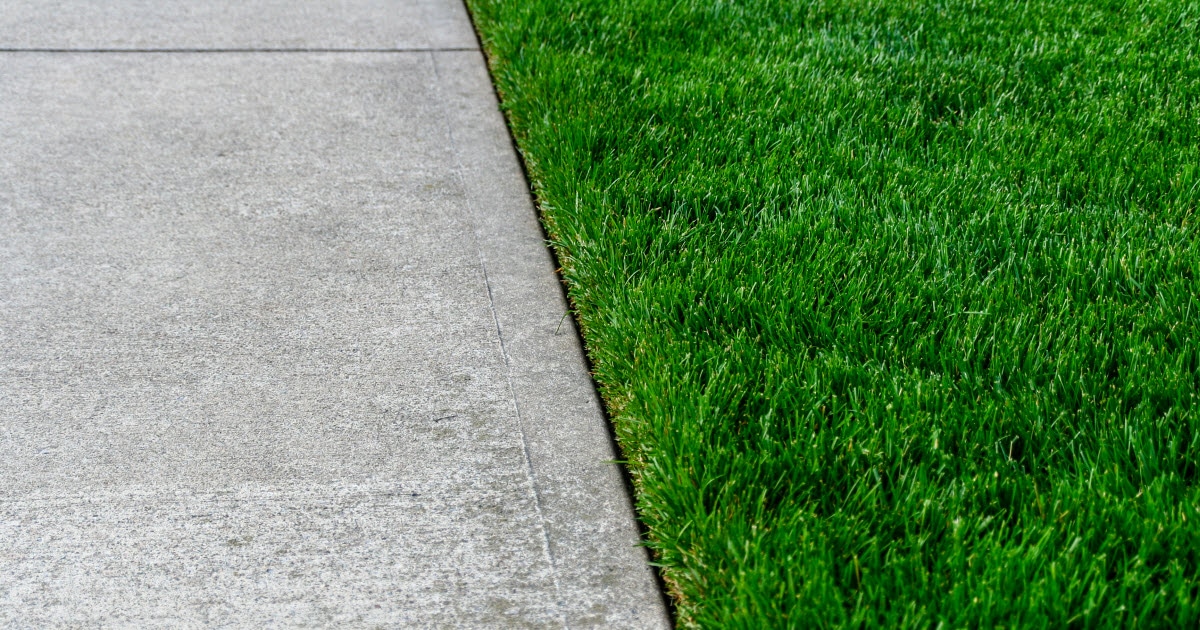
Having clean, crisp borders between your lawn, walkways, sidewalks, and garden beds will make your lawn appear clean, manicured, and professionally maintained. This one project will highlight your landscaping by offering clear borders and separating each part of your yard into designated areas.

While you can simply cut the grass and turf using a tool, there are also attractive physical barriers you can use to aid in defining the areas of your landscape. The styles and techniques used to achieve these edges add additional style to your yard and can enhance the curb appeal of your home significantly.
What the Experts Say
Experts at Kansas State University Research and Extension explain that “there are types of edgings to fit everyone’s taste, budget and style–formal or informal, subtle or bold, temporary or permanent, decorative or functional.”
They explain that there are several factors you should think about when deciding on which edging materials to use. One of these is whether you’re looking for a “formal or informal” style.
You should also consider your budget and the ease or difficulty of installation.
In today’s article I’ll cover both cutting a simple lawn edge in your grass, and physical edging options.
The Basics of Edging a Lawn
Lawn edging is too delicate of a process to rely solely on your lawn mower. Mowers are too large and imprecise to make a clean edge, and anyone who has tried to edge along a defined garden bed with a push mower knows what I’m talking about.
For regular upkeep, you’ll need to start off the year by re-edging every border of your lawn on your property. This can be a big project depending upon the size of your yard, but it’s worth doing in the spring. If you do, you’ll simply need to maintain that edge by trimming it through the summer.

Most lawn grass wants to spread out. It’s a survival trait that many types of grass have, and so your lawn will naturally try to encroach on your walkways and garden beds throughout the season.
But you’re in charge of your grass – your grass isn’t in charge of you. You’re the grass daddy or grass mommy, and like any good parent – you need to set boundaries for your lawn.
It’s a good idea to remove about a half-inch of grass edge from your garden bed at the beginning of the season using either a half-moon, manual edger or a motorized one. I personally like to do this task by hand as it gives me more control. I have used this flat spade from Fiskars for years and highly recommend it for the job.
After your spring edging work, maintenance throughout the balance of the season is easy with either a string or stick trimmer (more on that in a moment).
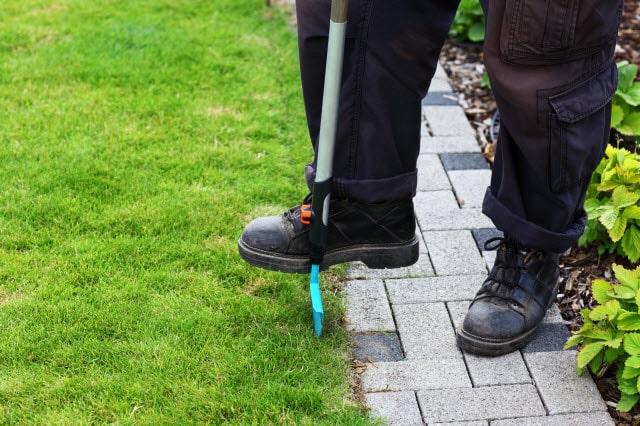
How to Manually Edge Your Lawn
First, you’ll use the edger to cut and remove the dirt to create a straight, even edge. I like to do this after it rains, when the soil is soft, but not wet. This allows you to cut in easier and the soil separates better for a nice clean edge.

For increased precision on straight runs, place a wood plank on the ground (grass side)to use as a cutting guide.
For curves, I recommend that you map out your edges of your garden bed using a rubber hose. This rough guide will keep you on track and ensure that the shape of your bed that you define is just how you want it.
As you edge your lawn manually cut in from the grass side, digging a nice straight line down and flicking the exposed turf into your garden bed. When you’re finished, be sure to rake all of these clumps of grass up and compost them (don’t leave them to take root in your garden).
How to Edge Your Lawn with a Motorized Edger
A motorized edger will cut through the grass more easily, and if you choose a high-end model you’ll probably get great results. For large properties with extensive gardens this might be your best option.

Depending on the type of power edger you have, you may still have to manually remove the dirt from the trench when you’re finished.
If your lawn has a broken edge or uneven edge afterwards, don’t worry. Use your edger to cut out a square and rotate it so the flat portion creates the outer edge.
Types of Edgers and Trimmers (and the difference between them)
Many people think that if they own a string trimmer they can just edge their lawn and garden beds with that.
Not really.
A string trimmer is really a tool that’s designed for cutting grass in hard to reach areas (around your mailbox, under fencing, around trees, rock walls, etc.). It can be effective at maintaining the edge you cut around your garden beds with an edger, but it isn’t a tool for cutting the edge.
A string trimmer is an essential lawn care tool in my opinion, but owning one doesn’t mean you shouldn’t also own a tool for edging.
The good news is that there are a wide range of lawn edging tools, and you can find one that works well for your property and your budget with a little guidance.
I’ll provide that now:
Types of Lawn Edging Tools (plus my recommendations)
I’ll cover your edging tool options here, starting with the least expensive tools and working up to the most costly options.
Half-Moon Edgers and Spades
A half-moon edger (like this one on Amazon) is inserted into the ground like a spade. Then the user rocks it back and forth to cut the turf in a straight line. This edging technique allows you to maneuver with ease. I recommend it for tracing curves and other tough shapes when edging my lawn.
The same is true with the flat spade I use (Amazon link), except that you simply cut your line with one push of your foot, then move on.
Between the two, I prefer the spade. But both tools linked above are in my garage. They’re high quality and easy to handle, even for beginners.
This is the cheapest approach and (most importantly) these tools take up the least amount of space in your garage or storage shed. That’s a really valuable quality in my view, and it’s why I don’t own any of the other types of edgers listed here.
Rotary Edgers
A Rotary Edger like this one on Amazon is another manual tool for lawn edging, but it is more mechanized than the half-moon edger or a spade. These types of lawn edgers have a blade attached to a rotary wheel that spins as the user pushes it, cutting through dirt in the process.
One note – just because this has a mechanical element doesn’t mean that it’s easier to use than a spade or half-moon edger. In my view it’s just the opposite – these guys are a workout (fun to use, but I think they’re better at maintaining an edge than they are at cutting a new one).
Electric Power Edgers
The GreenWorks 27032 is a powerful electric edger that matches durability with environmental friendliness (no small-engine emissions during use).
There are a lot of options in this category, but I’ve trialed the Greenworks tool and it does a nice job.
Gas Powered Edgers
A mechanical, gas-powered edger, like the Southland SWLE0799 will cut much more quickly than a manual edger. It’s a good option if you are physically limited or have an extremely large property with extensive gardens.
There are more expensive models than the Southland linked above, and many of those earn better reviews. But for the money, this model is probably your best bet for a gas-powered edger to own as a homeowner.
String Trimmers and the Role They Play in Lawn Edging
A trimmer doesn’t have the power to cut through dirt, but they will maintain the clear, crisp edges by cutting the grass the mower can’t reach. A manual trimmer, like edging shears, is perfect for smaller yards, but burdensome with bigger projects.

Investing in a string trimmer makes countless lawn maintenance tasks much more manageable. These trimmers are mechanical and powered by either gas or battery. They will quickly trim the edges of your lawn to keep them uniform.
It’s best to use this after you finish mowing your lawn to clean up the edges your mower can’t treat. Make sure the blade is facing the edge of the walkway, driveway, or garden bed prior to starting. Also, be careful for any obstacles you might encounter, like trees, shrubs, or rocks. They can damage the machine.
Your Options
Smaller stick edgers work very well in this capacity, since they trim cleaner edges and are more forgiving with their precision. A string trimmer requires care to keep the grass height uniform, and the string mechanism doesn’t cut grass as cleanly. That said, they are priced more reasonably than stick edgers.
For both edgers and trimmers, the more complicated the mechanics, the higher cost. This is also true for the use of the machine. A gas-powered edger or trimmer will be louder, heavier, and produce smelly exhaust. That said, they have far more power and can cut through larger patches of weeds or finish edges more quickly on larger yards.
Personally, I own a Craftsman 20v battery-powered string trimmer I received as a gift. It works well for my medium-sized property.
As always, when using equipment for lawn care, use proper precautions. Make sure to wear long pants, protective eyewear, and sturdy shoes while edging and trimming. The blades are often exposed with edgers and trimmers, which put toes at even greater risk.
As with any power tool – you need to wear appropriate clothing and keep safety top of mind when operating power equipment.
Landscape Edging Design Ideas
To give your lawn a major upgrade and make maintenance of your property much simpler, you can install physical lawn borders to separate your lawn from garden beds and walkways.
Purchase landscape edging products in a local store, order them online, or you can DIY the project with whatever you have on hand or can find for free locally.

Installing a physical border at the edge of your lawn or garden beds will help to separate your grass from your garden or other landscaping and define the space. You can install lawn edging in any shape, and (if done properly), the right lawn edging can make maintenance of your property far simpler.
The right physical barrier at the edge of your lawn can, in many cases, remove the necessity to use a separate trimmer, and even if you do still need a trimmer, the barrier makes it so you don’t require as much precision, and you won’t have to get out your trimmer quite as often.
Most physical lawn edging options are either driven into or installed into the soil to become a part of the ground and landscape. These can be made from stone, brick, wood, metal, or even plastic.
In this section of my lawn edging guide I’ll discuss some of the most popular options, and provide tips about installation and explain why each choice may (or may not) work for you.
Let’s start with…
Plastic Lawn Edging
Plastic lawn edging is typically sold as part of a ready-to-install kit (like this one on Amazon). It’s inexpensive, lasts a long time, and when installed properly it does a nice job to define unique spaces of your yard and lawn.

Plastic lawn edging offers homeowners a lot of flexibility for installation and design, since these products work well when installed as both straight or curved lawn edges.
Plastic also tends to be one of the least expensive options (hence its popularity).
Your kit will come with interlocking pieces and a bolt to install them. Simply place them in their desired location and use a rubber mallet to bolt the locking pieces into place. Make sure to sink the edges of the pieces themselves into ground, as well, to mow around it more easily and keep it secure. This also helps to prevent undue damage.
One of the mistakes homeowners make when installing plastic lawn edging is leaving the plastic too high, which means that your mower blades or string trimmer will often knick and chew up the top surface of the plastic. This quickly creates a ragged and unsightly appearance which is easily avoided by burying the plastic below the desired height of your lawn grass.
My Recommendation: Mow Over Plastic Lawn Edging
You can purchase mow-over plastic lawn edging, which offers a better look and more convenience in my view.
This type of edging has a flat platform on one side that is wide enough for two wheels of your lawn mower to cruise on top of. This allows you to mow the grass along the edging without extra tools or equipment, and prevents damage to your edging from your mower blades.
It also saves you from that inevitable lean as you mow along a deep edge as you try to keep your wheels from slipping down into the garden bed and scalping your grass.
Plastic edging is a great choice due to its low cost and easy installation. However, one drawback to this option is that plastic edging tends to be less durable than some other options. You will probably need to replace it every 5 years or so.
If you have children and pets, plastic edging has fewer hazards to be concerned about, though. It offers you a range of colors and design choices, from faux-slate in addition to the more classic look of smooth black plastic.
Metal Lawn Edging
Metal lawn edging tends to be just as easy to install as plastic edging. It’s durable, attractive, and will last for years.
You can purchase metal lawn edging kits (like this one on Amazon) the same way you purchase plastic edging kits, and the only tools you’ll need are a shovel and a rubber mallet to insert your new edging into your yard.

Most metal lawn edging has a lock-in-pin interlocking system. I like this option because metal edging is far more robust and will last longer than plastic edging.
I recommend that when installing your metal lawn edging you leave at least a half-inch of the edging above ground. This will ensure your edging is effective, but it also makes for invisible borders and easy mowing.
If you want to see your new edging, install higher.
Personally, I love the look of metal edging and the patina it earns over time. I like to install it at the edge of the gravel I have against my foundation for drainage, between the gravel and mulch of my garden bed, leaving it high so it’s visible and adds some structure to define my garden beds.
Aluminum vs Steel
There are several varieties of metal edging available. The two most common are made of aluminum and steel.
Aluminum kits (like this one on Amazon) tends to be a more popular option since aluminum won’t rust or oxidize the way steel would. Aluminum options also offer a wider array of environmentally conscious edging choices. Since aluminum is so easily recycled, more companies are creating recycled aluminum edging. It’s incredibly easy to install and comes with the same corrosion resistance of the non-recycled variety. If you’re looking to incorporate recycled materials and edge your lawn in an eco-friendly way, aluminum is a great choice.
Steel will rust, so the way it looks at installation won’t match the way it looks after it ages in your landscape, but I love the patina and color that it adds to the landscape. You may hate it – it will come down to your personal taste.
DIY Installation of Metal Lawn Edging
Metal edging is a fantastic option if you’re planning to install your edging yourself but still want a professional look.
You can purchase flexible metal strips to install if you want to maintain some natural curves within your garden.
If you want your home to have a modern, industrial look, you can install weathered steel edging around your garden. It’s also perfect if you use a hybrid design, like incorporating metal between wooden slats.
Choosing steel offers many unique looks, as steel can be galvanized, or left to slowly rust and develop a natural aged patina.
Steel kits also often require no digging, as they can be bolted or pinned into place from a coil with ease.
Various kits, especially including the coils, offer you a variety of sizes and options.
Coils can be sold at up to 100-feet in length and these kits can easily be cut and bent to size and shape using proper shears (like these ones on Amazon).
Other kits are sold in interlocking segments that range from 4-inch long pieces, up to 39-inch long pieces. These are optimal for smaller garden beds and can quickly be installed around your raised garden bed, planted trees, or along driveways, foundation gardens, and walkways.
Stone Edging
Your design choices become limitless very quickly when you choose to edge with natural stone or concrete pavers.
Stone edging is a lovely choice that creates a natural, rustic look and can add dimension to any landscape.

This option tends to be more expensive, especially if you’re relying on store-bought stone. It has an added challenge because stones are not typically uniform (which is why some people choose to go with pavers instead). That said, despite the challenges, stone edging provides some of the most impressive finished results, and the places in my garden which have stone perimeters are some of my favorite.
Stone Edging Options – Choosing the Right One for You
There are many types of rocks you can use when you edge with natural stone. Cobblestone and river rock are just a few examples.
Natural stone is expensive, but it is also incredibly durable. The challenge is coordinating the varied sizes of rocks to deliver the performance and the look you need. This challenge becomes even more significant if you choose larger rocks.
You can install them into the ground using concrete, but they’re just as lovely as an above ground rock wall barrier.
To install the rocks into the ground, dig a trench along the border of your garden or walkway, and fill it with either gravel or sand. This allows you to make sure the stones are level with each other, and improves drainage.
Next, set your stones and apply dry concrete or a polymeric sand between the stones, spray with a hose, and allow it to set.
Wood Edging
Using wooden edging is less common in American landscapes, but it can be a great, inexpensive material to choose, offering a warmth and natural look that you can’t achieve with any other material.

Wood is a more cost effective, less durable option, and one that creates a beautiful, rustic (or modern, depending upon the installation) look at your lawn’s borders.
You can purchase treated landscape timbers at any box store for under $7 per 8 foot timber. These can be placed around your lawn and garden beds flush with the turf of your lawn and set in place with galvanized landscaping spikes, creating some inexpensive mow-over lawn edging.
If you prefer a more vertical look, you can cut landscape timbers and place them at the border of your lawn vertically, making it easy to create graceful curves that look stunning. Of course you can also buy pre-made wood edging kits like this cedar option on Amazon for under $20, but if you’re handy you can usually DIY your wood edging for less money than you would spend on a kit (and get the exact look you want).

Wood will provide you the same amount of creative freedom as stone, since you can vary the heights of your spokes for decoration. If your lawn has curves to it, wooden edging can easily be designed around them.
Don’t limit your thinking to just wood, or just stone, either. You can mix and match your design by using wooden spokes or timbers with stones placed in between for accents.
Concrete Edging
Using concrete to complete your lawn edging is probably the most durable and permanent of your options. It also can be simple (even if it’s hard work) to install yourself, making it an inexpensive choice.

A homeowner with some experience in the DIY arena can create lovely concrete edging in a weekend with some hard work and careful planning. With professional help, or more effort, you can create even more beautiful results with concrete.
How I Recommend Installing Concrete Edging
The first task to install concrete edging is to dig a trench along the border you want to fill. For the most simple installation, place sand or gravel at the base of the trench and then fill the space with pre-mixed mixed concrete. Trowel it smooth, and place river rock or other decorative stones into the concrete while it’s still wet if you want to add more depth and texture.

This creates a ground level barrier that can be easily mown over, making your weekly or bi-weekly mowings a breeze in the hot summer months ahead.
Personally, when installing concrete lawn edging in this manner, I love to place small decorative stone or glass in the concrete before the concrete dries.
This can create truly stunning, professional looking design that will set your yard apart and make lawn maintenance easy. It’s also incredibly durable and will not shift over time or rot. Add to this the fact that concrete is really inexpensive, and you’ve got a lot of reasons to tackle this project if you aren’t afraid of some hard work.
Brick Edging
Brick is another rustic, natural option that gives a more traditional look. If you have a brick home, a prominent brick chimney, or red tones in your home or landscape, installing brick along your lawn edges might be the best investment you could make.

Purchasing enough brick is quite the investment, and it does require some knowledge about brick laying and masonry to do the install yourself, so you may want to trust a professional with this project.
The principles of installing brick lawn edging are similar to those required to set stone.
You build a trench to fill with gravel and add a layer of concrete. Then you install brick in a pre-determined pattern. You can install them side by side in a traditional pattern, either vertically or horizontally, or alternate for a perpendicular design.
Brick works great whether it’s flush with the ground (easier to mow over) or raised (visible at a distance).
Tips to Stretch Your Dollar on Brick Edging
Stretch your budget with brick by being open to working with products that have a brick-like appearance.
Brick pavers (made of concrete), are an excellent choice if you’re on a tight budget and want the look of brick. Concrete pavers have the advantage of being more durable than standard bricks and they won’t break down as quickly.

Just like standard brick, you can set up pavers along curves and other unusual shapes.
There are also mow-over design variations using bricks that look wonderful. You can achieve a beautiful, functional look by placing a layer of brick level with the ground alongside the raised edging, and adding a row of bricks vertically against the garden bed.
This allows you to mow along the brick edging while still being able to enjoy the look of your brick edge from the street.
Why Experts Recommend Brick or Paver Edging
The Kansas State University Research and Extension experts we cited earlier say that “Bricks and pavers are the best options for cost, durability and style.”
They explain that using bricks or pavers for edging “controls spreading grasses and unruly plants, defines an area and reduces maintenance. Bricks and pavers come in numerous shapes and colors. They create strong, distinct edges even in an informal garden.”
Another perk is how you can find bricks and pavers “in numerous shapes and colors.” Plus, they offer “strong, distinct edges even in an informal garden.”
Final Thoughts About Edging Your Lawn
Whether you install a physical barrier, or use a lawn edging tool to cut a distinct edge in your lawn to separate your grass from garden beds and walkways, lawn edging will set your lawn apart and give it a beautiful, professional look.
While many lawn service providers offer lawn edging (and some include it as part of their standard practice) I believe that with a little practice any homeowner can take on this job.
Whether you decide on regular upkeep with an edger and string trimmer, or you install physical edging to cut down on maintenance time, edging your lawn will provide a sense of pride over your yard that is worth the investment.
Ways to Improve the Look of Your Lawn & Garden Edging
The basic principles of edging a lawn or garden bed are simple, but there are many ways you can further customize your edging.
One great (and inexpensive) way to enhance the look of your property is to install lighting along pathways and garden beds.

Not only does this look great, it increases visibility and safety on your property.
Too often homeowners focus on what their property looks like during the day and ignore its appearance at night. Investing in some solar-powered landscape lights (I have this set along my front walkway) can make your hard work pop 24/7.
Put Your Stamp on Your Yard
Lawn edging is the perfect opportunity to put your design stamp on your yard. The wide array of options you have lets you choose the perfect design to match your home. You don’t have to be a landscape designer to choose a great looking border, either. Anyone can do it!

The installation of edging may be simple, but your design possibilities are endless, making installing edging a fun weekend project.
You can use a clean, classic look with inexpensive plastic edging. Stone, brick, and wood edging provides a warmth and texture to the landscape that looks beautiful with a colonial or old-style home. Metal edging will create a modern or industrial design.
And you don’t have to choose just one option!
When you mix and match your choices the results often get even better. Don’t limit yourself in terms of material either. Anything you find can be incorporated into your design. Some of the most beautiful lawn and garden edges I’ve encountered are created with found objects and salvaged materials used in a creative way.
This is your opportunity to enhance the beautiful lawn you’ve been working so hard to achieve. Don’t be afraid to take chances when choosing physical lawn edging for your property.


4 thoughts on “Lawn Edging: The Ultimate Guide”