Do you need to do some troubleshooting or maintenance with your lawn mower? If so, you’ve probably wondered where the carburetor is on a lawn mower. The location of this component of your mower’s engine can vary depending on the type of lawnmower you have.
In today’s article, I’ll tell you what a lawn mower carburetor looks like, where it usually is found on every type of mower, and provide a list of cleaning tips to maintain your mower’s carb.
Let’s get right into it!
This article was last updated on by Lawn Chick Owner Sarah Jameson
Article content reviewed for accuracy by Horticulturist Arthur Davidson, A.S.
All About the Lawn Mower Carburetor
What it Looks Like, What Parts of the Mower it Connects to, and More
The carburetor is an essential part of your lawn mower’s engine. It makes sure that the correct combination of fuel and air will go into the engine cylinder. This is essential for combustion to occur.
When the spark plug ignites the fuel and air mixture, it combusts and pushes the engine piston in a downward direction. This, in turn, rotates the crankshaft. This makes the lawn mower blade spin.
Depending on the type of lawn mower you have, the wheels of your mower (for example, a riding mower or self-propelled mower) will also start to rotate.
How to Find and Identify Your Mower’s Carburetor
The carburetor is part of the mower’s engine. Typically, it is bolted to the side or top of the engine. It is also connected to the gas tank, and will typically be located just below or behind your air filter. Most lawn mower manufacturers make the air filter housing easily accessible and easy to identify so that owners can change out the filter as part of their annual maintenance. Find the air filter and your mower’s carburetor will be the next part of your mower’s engine, right behind it.

While the location will vary by manufacturer, there are a few qualities most carbs share to make them easier to identify.
Carburetors are metal and rectangular in shape. Your mower’s carb will often have black areas, such as a black circle and trim on the right and left.
In this article I’ll walk you step-by-step through locating and servicing your mower’s carburetor, with specific tips for locating the carburetor on every type of lawn mower.
Different Kinds of Lawnmower
In this section, we will go over the different kinds of lawnmower and where you can usually find the carburetor in each. The two main kinds of lawnmower are walk-behind and riding.
Walk-Behind Mowers
There are four main types of walk-behind mowers, which I list below – if you own a walk-behind mower make sure you know which type it is so that you can refer to the correct part of this article to locate your mower’s carburetor:
- Electric walk mower: An electric walk mower is appropriate for smaller properties.
- Self-propelled mower: A self-propelled mower is handy because it propels itself, meaning it’s a lot less work when mowing hilly areas. If you get a self-propelled mower, you can choose front-wheel drive or rear-wheel drive. Front-wheel drive is suitable for level ground. A self-propelled mower with rear-wheel drive is most suitable for sidehill and uphill mowing.
- Two-function mower: A two-function mower mulches and bags as well as does the usual grass cutting.
- Three-function mower: A three-function mower cuts the grass as well as bags, mulches, and side discharges.
Riding Mowers
There are three main types of riding lawn mowers, which I list below. If you own a riding mower, make sure you know which type it is so that you can refer to the correct part of this article to locate your riding mower’s carburetor:
- Rear Engine Riding Mower: The rear engine riding mower is the smallest of riding mowers.
- Lawn Tractor: Lawn tractors (sometimes called garden tractors) have very powerful engines, which are great for large properties.
- Zero Turn Radius Mower: Zero turn radius mowers are also very powerful, but they are easier to maneuver.
Carburetor Location in Walk-Behind Mowers
For walk-behind mowers, you will find the carburetor at the side of the mower, in the area above the base of the mower. As we mention later, the carburetor is connected to the air intake and air filter of the mower. Therefore, finding these components makes it easy to find the carburetor.

If you’re having trouble finding them, search for square-shaped or round-shaped filter housing. This will generally be on the side of the mower’s engine, though it’s sometimes on the top.
The air filter case is usually plastic and pops open easily to provide easy access to the filter for maintenance. The mower’s carburetor is just behind the air filter’s housing, and there are typically 2-3 bolts that can be loosened to remove the filter housing and reveal the carb.
This video does a nice job demonstrating the removal and cleaning of the carburetor on a walk-behind mower:
Carburetor Location in Riding Mowers
On a riding mower, you will generally find the carburetor on the side of the mower’s engine. Similar to a walk-behind mower, the carb is located below or behind the air filter. You’ll have to remove the filter and the air filter housing to access it. Once you remove the air filter housing, you can identify the carburetor by following the fuel line from the gas tank to the carb.

The exact process for repairing or replacing a carburetor in a riding mower will depend on your exact model, and it tends to be more complicated than working with the carburetor of a walk-behind mower, so you may choose to hire a professional at a small engine repair shop to do this for you.
If you are going to do a carb repair or replacement yourself, my advice is to consult the manual that came with your machine, and document every step of the process so that you can remember how the carb was set up and have an easier time re-attaching everything properly.
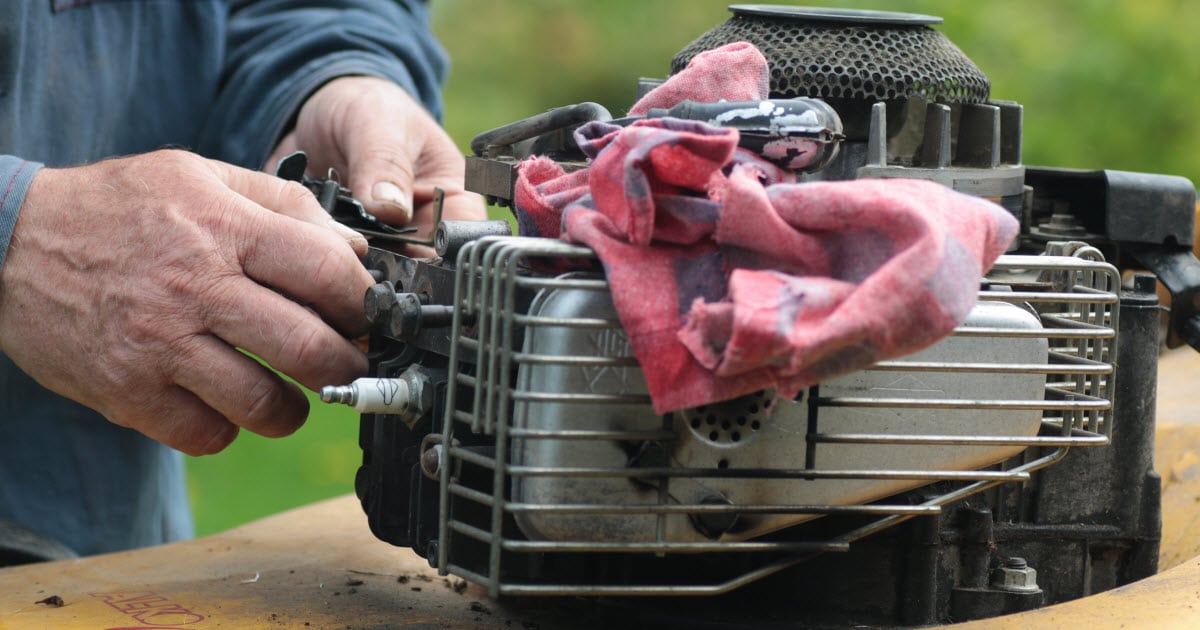
Here’s a video from Sears that walks you through replacing the carburetor on a Craftsman Mower. It provides a good sense of what’s involved in this project, what your riding mower’s carburetor looks like, and where the carb is located on some riding mowers:
How to Replace the Carburetor in a Riding Mower
We’ve listed a general set of steps to replace the carburetor on a riding mower below. Understanding the steps of this process will make it much easier for you to find your mower’s carburetor.
Uncovering the Carburetor
- After turning off the ignition switch, take out the key.
- Lift up the mower’s seat.
- Find the bolt that connects the negative cable and battery, and disconnect it. Ensure the battery cable won’t touch the battery post. You can do this by tucking it away.
- Lift up your mower’s hood.
- Pull off the air duct after removing the air duct mounting screws.
- Find the air filter cover retaining knobs. Rotate each of them counter-clockwise and then take off the air filter cover.
- Take out the air filter.
- Remove the air filter housing screw.
- Take out the bolts connecting the front blower housing mounting, then repeat for the rear blower housing mounting.
- Lift up the blower housing and put it aside.
- After removing the lower dash fastener, take off the lower dash.
- Take a pair of hose pinch-off pliers and clamp off the fuel line.
Disconnecting the Carburetor
- It’s best to take a picture of the linkage connections for the carburetor, so you can easily remember their location. This will be very helpful during re-assembly.
- Disconnect the clamp that connects the fuel line to the carburetor. Pull off the fuel line from the carburetor. This will make a mess, so use a rag to help mop up drips.
- Take out the air intake mounting nuts.
- Disconnect the breather tube and take out the air intake.
- Take out the wire from the fuel solenoid.
- Take out the mounting studs for the carburetor.
- Pull out the throttle rod and throttle spring.
- Disconnect the choke rod.
- Disconnect the carburetor.
- Find the intake gasket on the engine and remove it. Clean off the surface of gasket mounting.
Installing a New Carburetor
- Take your new carburetor and put it near the engine. You now need to reconnect the choke rod.
- Connect the spring and throttle rod.
- Do installation of your new intake gasket on the mower’s engine.
- Use the mounting studs to attach the carburetor to the engine.
- Securely tighten the mounting studs.
- Take the fuel solenoid wire and connect it.
- Connect the breather tube to the air intake. After that, attach the air intake to the carburetor.
- Do installation of the air intake mounting nuts.
- Connect the fuel line to the carburetor.
- Take the hose pinch-off pliers from the fuel line.
- Put the lower dash back in, using a fastener to secure it.
- Properly position the blower housing back on the engine, and align the air diverter correctly within the housing.
- Put the blower housing mounter bolts back in.
- Put the air filter housing screw back in.
- Re-install the air filter.
- Put the air filter cover on the mower’s engine. After that, do a clockwise turn on each retaining knob.
- Re-install the air duct. Use mounting screws to secure it.
- You should now reconnect the negative cable to the negative battery terminal.
- Bring the seat back down.
Our Expert Take
Art Davidson, a member of our expert panel with over five decades of experience in horticulture and landscaping, says: “I highly recommend replacing a carburetor as opposed to repair. The cost difference has now made it possible to replace the carburetor and save a lot of time.”
He adds a tip, suggesting that “before carburetor replacement, take pictures with your cell phone from many angles,” and reminds readers to “make sure there is a replacement gasket prior to replacement.”
Steps for Finding Your Mower’s Carburetor
Every lawn mower is a little different, but if you follow the steps below, you should easily locate the carburetor in your lawn mower’s engine.

- Step 1: Turn off your mower’s ignition and use the parking brake. To stop any accidental rolling, put the mower in gear.
- Step 2: Make the mower’s engine accessible by releasing any restraining devices (such as hood latches) that are holding down the hood.
- Step 3: Find the air intake and the filter. You should find filter housing (square or round-shaped) on the side or top of the engine. This will have slits or holes in the top. The filter housing will be attached to the carburetor by screws or latches. This housing contains a filter made of foam or paper. The filter found within the housing is there to stop dust and dirt from getting into your mower’s carburetor.
- Step 4: Locate the fuel line that comes from the gas tank. You can use this information to find where the gas tank. Gas tanks will usually be mounted in a place that makes it easy to access for re-fueling and is often black.
- Step 5: Find the fuel line that comes from the tank. This line will usually be situated in close proximity to the bottom of the tank. A small clamp is usually there to attach it. You can trace the fuel line that attaches the tank to where it connects with the carburetor.
Why is it Important to Clean Your Lawn Mower’s Carburetor?
The carburetor of your lawn mower needs to be kept clean in order for the machine to work as it should.
Think of the carburetor in a car. If it isn’t kept clean and properly maintained, your vehicle will not run properly.
This is the same with a small engine such the kind you have in a lawn mower.
If you are having certain problems with your mower, there is a good chance that you need to clean the carburetor. Below are some signs of a dirty carburetor:
- You’re having problems with the engine stalling when you are trying to cut the lawn.
- You are having difficulty starting the mower.
- There is black smoke coming from the muffler.
- The engine is sputtering or running turbulently during mowing.
- You have noticed an increase in your mower’s fuel consumption, even though you are using the way you always have.
How to Clean a Mower Carburetor Once You Locate It
Let’s take a look at how to clean a lawn mower carburetor.

Please note that these are general instructions and you should consult with the instructions that come with your particular mower before you proceed.
Removing the Carburetor
- You must completely remove the carburetor from the lawn mower before trying to clean it.
- If it is necessary, take off the engine cover.
- Take off the cover of the air filter, the filter, and the housing of the air filter.
- If possible, turn off the fuel valve. If this isn’t applicable, make a crimp in the fuel line. After that, take it off the carburetor. Be ready for a bit of fuel to spill out. You can use a rag to deal with the mess.
- Get the choke and throttle linkages detached from the carburetor throttle lever.
- Use a sliding motion to remove the carburetor from the mounting bolts.
- If necessary, release the carburetor bowl by unthreading the screw. This will release the bowl.
- Release the float and needle by removing the float pin.
Cleaning the Carburetor
- To completely take apart the carburetor, you will possibly have to unthread screws so that the primer bulb and base are released. After that, take out the metering plate, diaphragms, and gaskets.
- The outlet ports and carburetor intake should be exposed. You should then use a special carburetor cleaner spray (if you don’t have that, then WD-40) to clean out residue from the ports.
- If there is a bowl, clean it out.
- Check if there are any signs of rust in the carburetor. If so, get rid of it with sandpaper.
- Give the carburetor time to dry. After that, put it back together. Ensure that the diaphragms, metering plate, gaskets, and primer base are correctly positioned. Also do the same with the float and float needle.
- Ensure that you put the bowl gasket back in its correct place. Reinstall it if that is necessary.
- Use a sliding motion to reinstall the carburetor onto the mounting bolts. Get the throttle linkages re-attached to the throttle lever.
- Reattach the carburetor to fuel line.
- Reinstall the air filter, filter cover, and air filter housing.
- If this is necessary, reinstall the engine cover.
What if the Carburetor Needs Repairs?
It is possible that your carburetor will need repair as well as cleaning. If that is the case, you can consider buying a carburetor repair kit. This will help you with replacing some of the major components of the carburetor, such as the diaphragms, gaskets, float, and float needles. You can probably find a kit that matches your mower on Amazon for less than $20.
If you find that the carburetor continues to have poor performance, it’s possible that you will have to get a new carburetor and replace the old one. The price of a replacement carburetor will typically be about $50, and you can find genuine manufacturer’s carb replacements on Amazon (like this one for a Honda self-propelled mower).

If you’re sure your lawn mower issues are the result of carburetor problems, it’s generally easier to buy a new carb and replacing the whole thing vs attempting to repair a few gaskets or parts.
In my experience a repair kit works better in theory than in practice, and your average weekend warrior is better off replacing the whole thing if determined to DIY a fix. For $30 more, why not install a brand new carb?
The other option (recommended for most people) is to take your mower to a small engine repair shop and let them do the work for you. This is less expensive than you’d think, and will save you some time and headaches.
For optimal lawn mower maintenance, you should clean the carburetor every year.
This will help your mower always perform at the optimal level and help to hold off problems that will require parts replacement or full replacement of the carburetor.
And you don’t have to take your carb out to keep it running like new – I give my mower a shot of Gumout Carb and Choke Cleaner (Amazon link) before every mow to keep it running like new. It’s like $5 a can and lasts a whole season.
Maintain Your Lawn Mower So It Lasts!
Understanding how your lawn mower works and how to maintain it is key to making it last.

Purchasing a new lawn mower is an investment, so it’s well worth taking the time to read the manual and understand all the components and their functions.
I have a spring mower maintenance checklist and tips to winterize your mower at the end of the season which are worth checking out.


