Maintaining a modest lawn not only takes physical effort, but it also uses up lots of your resources. You need to water and mow your lawn regularly to maintain its lush green color and prevent weeds from growing. You also may need to re-seed and apply fertilizers to ensure that the turf grass continues to flourish. But why do all this hard work when you can allocate that space to growing a beautiful garden instead? You’ll need to remove the grass and replace it with flowers or herbs to start your garden.
In this article, I’ll tell you how to remove grass to start a garden the right way. We’ll cover how to remove the grass to prevent weeds from overtaking your new garden bed and help it thrive.
Before you clear the grass, you need to choose an ideal spot on your lawn where you can create your gardening space.
This article was last updated on by Lawn Chick Owner Sarah Jameson
Article content reviewed for accuracy by Horticulturist Arthur Davidson, A.S.
Choosing a Good Location for Your New Garden Bed
Poor location is one of the primary reasons people fail with their new garden installs. Where you want your garden to be might not be the best location for plants to grow, so it’s important to think about the plants you’d like to grow in your garden, and then choose the best location on your property for them.

If you already know where you want to grow your garden, get a sense for the amount of sunlight (and kind of sunlight) it receives. Then choose plants that will thrive in those conditions.
Before I dig in (pun intended) to the best way to remove grass when creating a new garden bed, it’s worth taking the time to explain what makes a good (and bad) garden location.
Hopefully this will save you from some disappointment or frustration later on.
| LawnChick.com is reader supported. If you make a purchase after clicking a link, I may earn a commission at no additional cost to you. |
7 Key Factors to Consider When Installing a New Garden Bed
Here are the factors you must consider when siting a new garden:
Sunlight
You need to look for an area that receives six to 10 hours of full sunlight per day. Unlike some species of grass that can survive in the shade, flowers and vegetables prefer sunny areas for them to grow.
For example, flowers like aster, lavender, sunflower, and hibiscus need direct sunlight to bloom. Similarly, vegetables such as cucumber, squash, corn, and potatoes need to receive at least eight hours of sunlight daily.
Water Source
Like other living organisms, flowers and vegetables need water to survive. Your garden location should have ample water source nearby.

Try to avoid areas with sloping landscapes as they may be too dry. Also, avoid spaces that accumulate flood water as they may become too wet and soak your garden plants.
Soil
Soil is the foundation of your garden, so choosing the right type of soil for the species of flowers and vegetables you want to plant is key.
Ideally, the best type of soil for growing plants is loam, which is composed of sand, clay, or silt. You’ll want to have to loam soil that’s gritty and sticky when wet so it can hold more water and nutrients.
Terrain
The most suitable terrain for planting flower beds or vegetable gardens is flat ground. Avoid planting on rocky terrain unless you’re growing plants that have shallow roots and low water and nutrient requirements.
Some examples of plants that thrive in rocky soil are sage, thyme, coneflower, aloe vera, and baby’s breath.
Accessibility
Grow your garden close to your house, this way you can enjoy the beauty of the landscape even if you don’t leave your home.
But make sure it is far enough so that your house won’t block the sun’s rays.

You might also want to allot spaces for pathways that are wide enough to move a wheelbarrow around.
Compost Pile?
Make sure that you have space for storing leaves, trimmings, and waste as you can use them as compost in the future.
Neighborhood Rules
Before starting your garden, find out if your neighborhood rules allow it. Most urban areas have strict rules on gardening, so it is best to check and comply with the existing laws. This way, you can avoid getting into any trouble.
It’s always a good idea to call Dig Safe (or your local equivalent) a few days or a week before your project as well. They’ll come out and mark any underground utilities so you can dig with confidence and not have a big mess on your hands.
How to Remove Grass to Start a Garden
Now that you’ve chosen the best spot for your gardening space, let’s explore the different methods to remove grass from your lawn to start your garden.

The four best ways to remove grass to start a garden are:
- Digging (my preferred method)
- Smothering the Existing Lawn (if you listen, you can hear your grass’s muffled screams)
- Solarizing (you’ll get weird looks from your neighbors)
- Herbicides (you monster!)
Below I’ll introduce you to everything you need to know about each of these methods of removing your lawn grass for a new garden plot. I’ll share the pros and cons of each approach to grass removal, and provide some tips on how to best tackle each method of grass removal to establish your garden.
Let’s start with the approach I recommend:
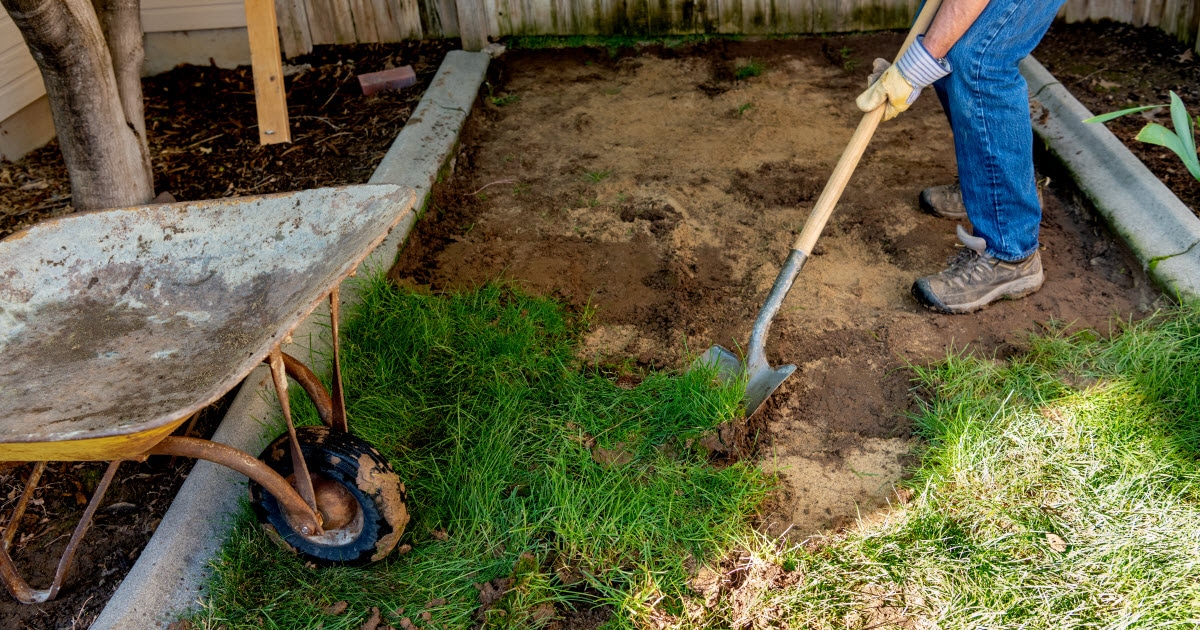
Digging up Your Existing Grass
Removing grass manually by using a shovel works well if you’re working on a small space.

While this method is more labor-intensive, it is faster and also less costly than others. You also don’t have to use chemicals or herbicides to get rid of the soil, and it’s great exercise.
Pros:
- It produces quick results-you can immediately plant in your garden.
- It creates less disturbance to neighbors.
- There’s no need to use electricity.
Cons:
- It is not ideal for large plots.
- There is a risk of exposing weed buried deep in the soil, which may lead to germination.
- It requires replacing organic material
My Tips for Digging Up Existing Grass to Start a Garden
If you are clearing a small portion of your lawn, you can mark the spot using a rope, garden hose, or spray paint.
Before digging up the sod, water the area a few days beforehand to loosen up the soil. This will make the task more manageable. You want the soil to be moist, but not muddy when you begin digging.
You can use a trowel, scraper, square or flat-head shovel, or a garden spade, for cutting and removing the sod. I prefer a flat shovel with a sharp edge. Fiskars makes a good one that doubles as an effective edging tool, so it’s a good investment for most folks who have a lawn that borders garden beds.
If using a shovel is too laborious, you can also use power equipment such as a tiller or a sod cutter. You probably know someone with a rototiller that would lend it to you, but if not you can buy a quality corded tiller online for $100-150. This model from Scotts has good reviews, but there are lots of others that are just as good. A gas powered tiller is a better choice for a large garden install.

If you’re going the mechanical route, a sod cutter can be rented for the day for less than $100 and these machines do a nice job.
Start by cutting the sod into sections or strips, averaging 20 x 20 feet.
Roll up the strips, remove them, and then transfer them to another spot if you plan to use them as compost later on. Remove excess rocks, grass, roots, or pests.
- Note – If your lawn has Bermuda grass, consider the solarization method or applying herbicides. This grass species tends to grow back easily because its roots run deep into the ground.
Smothering or Sheet Composting
Also called lasagna gardening or no-dig gardening, this method involves covering your lawn with sheets of cardboard, or newspaper to smother and kill the grass and then putting layers of straw, mulch and organic matter over the top of it.

Unlike manually digging up soil, this method is less strenuous but can take a few months before you can start planting. If you’ve got time, it’s a great option.
Pros:
- It does not require sod removal.
- The organic matter remains.
- There is no disruption to the soil structure.
- There is a minimal environmental impact because it doesn’t need herbicides.
Cons:
- Larger lawns will need more materials for smothering.
- It may not work on sloping ground.
My Tips for Smothering Your Grass to Start a Garden
Cut the grass short before covering the area with your choice of material. Doing this will flatten the spot and make it easier to add the sheets or layers.
If you’re using newspaper or cardboard, cover the area with 10 to 12 overlapping layers to ensure no sunlight passes through.
Water the layers with just enough water to make them stay in place and expedite the decomposition process. Over-watering can cause the layers to tear.
Next, add a layer of compost, about two inches thick.
On top of the compost, you can add one to two feet of organic matter such as manure, grass clippings, or food scraps. If you live in a neighborhood I don’t recommend food scraps as you risk attracting neighborhood pets and other critters.
Finally, top the entire area with up to four inches of mulch.
Ideally, you’ll want to start this project in the fall, so that the area is ready for planting by springtime.
Solarizing or Scorching Your Lawn
This method of grass removal involves using the heat of the sun to cook grass until it loses moisture and nutrients, and then dies.

Exposing the grass and underlying soil to high heat also kills bacteria, pests, and weeds.
Solarization typically works well on clay, loam, and other heavy soil types because they can hold more water for long periods and produce steam.
Pros:
- Since it does not make use of chemicals, it has a low impact on the environment.
- It requires minimal physical effort.
- It is ideal for large areas.
Cons:
- It is slower to complete. The area must be covered for at least four weeks.
- It does not look attractive.
My Tips if You Choose to Solarize Your Lawn Prior to Adding a new Garden
Begin by removing plants and other debris in the area. Cut the grass short, then water the area.
Once your site is prepared, you’ll cover the grass with plastic, glass, or a tarp.
If you’re using plastic, use clear ones rather than dark-colored plastic sheets. Thick plastic also works better than thinner varieties, which will quickly break down and tear. I recommend using a UV resistant type made for greenhouses like this one on Amazon as this is designed for outdoor use and will hold up well.
Secure the plastic covering with rocks or use garden stakes to secure it in place. If you’re using stones or other debris to hold the plastic down, use more than you think you’ll need. Wind will always find a way to get under it and you don’t want it blowing away.
You can also bury the edges under the soil to trap heat and make sure that no air can pass through. It’s more work, but will make your sheet a lot more secure and effective.
Leave the area covered for four to eight weeks, or until the grass down to the roots are completely dead. Your neighbors will really hate passing your yard during this time and if they’re like mine they’ll let you know.
The appearance of this (it looks bad) and the amount of time it takes (it takes a long time) are the main drawbacks to this method. It works really well because not only will it kill your grass, it also kills weed seeds in the ground so that your garden will get a great start with minimal weeding as long as you apply mulch around your plants.
Once the grass is dead (dig a small section to check the roots and confirm), remove the covering and you’re ready to plant. You can leave the dead grass there to compost if you like.

Before you plant seeds, till the top few inches of soil to loosen it.
If you choose this method, it is best to start towards the end of spring or early summer to make sure that the plot gets the ideal amount of heat. It’s not an effective method during the winter in most climates – especially if you get snow.
Applying Herbicides
Herbicides can be effective in killing grass quickly, but it is often avoided because of the harmful effects it can leave to plant, animal, and human life.
It’s a fast but a riskier way to remove grass to start a garden, and if you’re planning to grow edibles in this new garden I would absolutely recommend against this method.
Art Davidson, an horticulturist with over five decades of experience (and a member of our expert panel) agrees, saying that herbicides absolutely “should not be used if growing edibles.”

That said, I know it’s what some people do, so I’ll explain the pros and cons and tell you the best approach here anyway to help you minimize damage and do an effective job.
Pros:
- It kills grass, pests, and weeds thoroughly fast.
- Not as labor-intensive as the other methods of removing grass.
Cons:
- Herbicides must be handled with utmost caution. Otherwise, they may leave residue in the soil for weeks or even years.
- They are expensive. Plus, you may need to apply them more than once to be effective.
- They may harm the environment and kill beneficial organisms.
- They may contaminate your water supply.
My Tips for Using Herbicides to Kill Grass and Start a Garden
My first piece of advice is that you must choose the appropriate type of herbicide to effectively kill your lawn grass and any weeds that may be growing in the location where you plan to install your new garden bed.
Read the instructions on the label, specifically, on how to use the herbicide and how to properly dispose of any you have leftover, and the packaging. Make sure to follow these instructions completely. If you’re determined to use something that is harmful to plants, wildlife, and people, you have a responsibility to handle it and dispose of it properly.
And that starts with wearing the proper protective gear to keep yourself safe. Wear long sleeves, long pants, eye protection, gloves, and a mask at all times when handling and applying herbicides.
Before application, you’ll want to water your lawn wellto stimulate the growth of seeds or existing plants. Before spraying your lawn with herbicide, make sure that the grass is dry. Herbicides won’t stick to wet grass … you want the lawn to be well watered, but dry.
Once applied, wait for at least a week for the herbicide to take full effect. The grass is dead if it is wilted, brown, and brittle. If the grass is not yet dead after the first application, re-application may be required.
Re-application may also be necessary if you are clearing a well-established turf grass. A healthy lawn wants to live and will try to.
The best time to apply herbicides is during the hotter months (summer). Avoid spraying during the rainy season or when the weather is windy, especially if there are trees and vegetation near the area you’re treating with herbicides.
The herbicide you’re using should tell you when new plants will be able to grow on the site after application, so you can expect to wait until the herbicide is no longer effective in that area to do your planting and install your new garden.
Now You Know How to Remove Grass to Start a Garden
So, there you have it. Now that we’ve covered the different methods to remove grass from your lawn, you have a better idea on how to start your beautiful new garden.

Just keep in mind that whichever method you choose, prepping your gardening spot for planting requires some time.
You need a little patience and a dash of hard work, and soon you can start planting seeds. And after a few seasons, you will also enjoy the results of your labor.


